Tuesday, November 30, 2010

my netbook cover's not-quite-identical twin

Today I was excited to get another custom order on its way! After seeing the photos I posted on Facebook of my netbook cover, one of my friends requested one like it for her computer since red, black, and white are one of her favorite color combinations. Fortunately I had enough fabric left over from mine to make another!

The main differences between the two were the buttons I used (pictured above), the size (her computer is a few inches larger than mine), and the way I put in the zipper. I think that the zipper design on hers will be better in the long run, but I was disappointed that it turned out a bit lumpy--something I'm sure will improve with practice.

It is so satisfying when someone loves one of my designs enough to buy it and enjoy using it!

Monday, November 29, 2010

monday menu

[cherry upside down cobbler]

This is going to be a nice, short week for me as far as meal planning goes since we're going to be heading south for Benjamin's family's holiday get-together on Thursday! Here's what i'm planning on making:

M-venison steaks, mashed potatoes, spinach salad
T-minestrone soup, fresh rolls
W-chicken curry, rice, leftover spinach salad
Th-sandwiches and fruit in the car on the way to vacation!
F-whatever my mother-in-law has planned : )

What are you making this week?

Friday, November 26, 2010

thanksgiving

how odd
to have one day of the year
devoted to giving thanks

when really we should
give thanks in everything
every hour
every day
every week
of every year

not that I mind the reminder...


this year
the tip of the iceberg
of my thankful list
includes:

God's unfailing love
His faithfulness
His grace

the love and esteem
of a godly man
the ways he surprises me
the way we are friends

my sweet little boys
their smiles and cuddles
and even the tantrums and traumas

my dear parents
friends, encouragers
givers of good

Benjamin's family
his parents, grandparents, aunts, uncles
his siblings who make me feel less like a lonely only child

my wonderful friends
we rejoice together
and bear one another's burdens

my cozy home
complete with a "new" kitchen
a work of love
(and the wood stove that helps keep us warm)

music, laughter, art
joy, hope, peace

the list could go on and on

Wednesday, November 24, 2010

snow and ice

[one of my first attempts at close-up snowflake photography]

Well, after our lovely, long (for us) autumn, winter has set in with a vengeance. We have about 10 inches of snow on the ground right now, and yesterday had a balmy high of -2 degrees Fahrenheit. Brrrr!

I am so thankful for the cozy blankets on our beds, the roaring wood stove in the basement, the furnace that helps circulate the heat, and the yummy stew we had for dinner!

In spite of the bitter chill and the inconvenience of bundling up, the snow sure is pretty to look at. I suppose that when it really comes down to it, I'm thankful for the snow too. : )

Tuesday, November 23, 2010

netbook cover

A couple of weeks ago, I had the opportunity to drive to one of the"big cities" that is relatively near us to go shopping for wedding stuff with a dear friend who is getting married this June. Besides getting a lot accomplished (we found many of the supplies she needed in just the right colors and patterns!) we had a great time talking, laughing, and catching up in general. She did most of the shopping while I encouraged, advised, and spotted good things. However, I couldn't be in such marvelous craft and fabric stores without splurging on a few goodies for myself...

See, my new-to-me netbook came with a painfully bright pink case. I've wanted to make a new case for it since I got it, and while I was shopping I spotted a combination of fabrics that I fell in love with even though they're a bit out of my comfort zone. I just knew they would be perfect for my netbook case, so how could I leave them in the store? : )

After reading a few netbook-case-making tutorials (this one and this one gave me some ideas), I came up with my own design.

The zippered bag is padded with a double layer of fusible fleece to protect the laptop inside.

On the front is a roomy pocket complete with a ruffled flap embellished with embroidery and button flowers in which to store my power cord and a USB mouse.

Oh, I just love that black and white print...I almost wish my computer was larger so I could have used more of it! : )

The bag is lined with a fun and quirky owl print that never fails to make me smile.

All right. Enough show and tell for today. I'm off to work on laundry and house cleaning. I have a big rest-of-the week ahead full of cooking and guests, Christmas cards and custom orders. Here's to an immensely profitable day...

Monday, November 22, 2010

monday menu

Well, good morning! I'm getting back into the swing of things after having a lovely night away with Benjamin in one of the "big cities" close to us (in Montana terms, at least). We had a fabulous time eating sushi and trying out the hotel's water slide but not at the same time. : ) After the refreshing break, I'm happy to be getting back to normal, if a holiday week can be considered normal... Here's what I'm cooking this week:

M-chili, rolls, corn
T-crock pot roast with potatoes and carrots
W-pasta with red sauce, grilled chicken, and vegetable
Th-Thanksgiving feast: roasted chickens (my mom and I are allergic to turkey), mashed potatoes, gravy, dressing, sweet potatoes, cranberry sauce, green beans, rolls, mulled apple cider, and apple crisp (no pies unless someone else brings them because I'll be tired of cooking by then!)
F-leftovers! (of course)

What are you making this week?

Thursday, November 18, 2010

photos

This morning I enjoyed having a mini-photoshoot with some friends' two beautiful children. The goal was to get a Christmas card worthy photo of them together, and I think I was able to succeed though the individual portraits did turn out better. I'm telling you, these cuties sure struck some fabulous poses and made my job easy. The following are some of my favorite shots:

Wednesday, November 17, 2010

apple-ginger glazed carrots

My grandparents' good southern upbringings and their love of grits, sugary veggies, and bacon grease in [almost] everything, did not rub off on me. (I do, however, have a healthy appreciation for sweet tea... Ahem, I digress.) I am not a candied vegetables kind of girl. Most the time a little salt and the occasional dash of pepper or rare pat of butter is good enough for me. Every once in a while, though, I begin to long for syrupy carrots. When the longing becomes un-ignorable, I turn to this super-easy and tasty recipe.

Combine in a pot:
2/3 cup apple juice
1/8 cup brown sugar
1 teaspoon powdered ginger (or 1/2 teaspoon fresh ginger)
2 cups sliced carrots
pinch of salt

Bring to a boil, then reduce the heat so that the mixture begins to simmer. Cover and cook for 15 minutes. Remove lid and cook for 15-20 more minutes, until the syrup is reduced and carrots are tender. Enjoy!

Monday, November 15, 2010

monday menu

[ginger cookies with pumpkin-cream cheese frosting]

Well, this week will probably be my last "normal" week before the happy holiday chaos begins. Here's what I'm planning on making:

M-minestrone soup, bread
T-steak, gravy, mashed potatoes (plus extra potatoes for Thursday), vegetable
W-chicken cacciatore, vegetable
Th-shepherd's pie
F-grilled chicken, rice-a-roni, vegetable

What are you making this week?

Saturday, November 13, 2010

first fish

It seems like last month was a month of firsts for Little Man. Not only did he make his first calligraphy, but also he and Grandpa (my dad) also caught his first fish: a big and beautiful brown trout.

In addition to the excitement of catching the fish, he had his first falling in the river adventure (you can't tell in this photo, but he was wet up to his armpits). Falling into the nearest body of water seems to be in our genetic make up, and I suppose he couldn't escape it forever... Thankfully little Man was able to overcome his aversion to falling in and has had several more happy fishing excursions since then.

Friday, November 12, 2010

first calligraphy

A few weeks ago while I was working on a calligraphy project, Little Man wanted to get in on the action. I gave him one of my Schaeffer pens (one of the most basic, tough pens in my collection) and a piece of scrap paper and let him go to town. I think it's safe to say that we were both delighted.

Here's the finished product, billed by one of my friends as "Custom Abstract Art on Practical Paper." Dreaming of many, many more calligraphy days with my little guys...

Wednesday, November 10, 2010

all dressed up

Another better late than never post:

We don't find many opportunities for dressing up in our wee, western town. So when we were asked to play music for the fundraising banquet for our local crisis pregnancy care center the last week of October, we jumped at the chance not only to help them out by playing beautiful music but also to dress up in our classy clothes. It was so fun to dress up in my little black dress, accented with high heels, pearls, and my white French silk scarf (it's actually from France; my mother-in-law brought it back after visiting Paris) and go out with my handsome husband.

Later in the same week, we went to a costume party at some friends' house. (It was Benjamin's first costume party every, and the first one I'd been to in over ten years!) We enjoyed dressing up for it in a completely different way. I wish we had gotten photos of our entire outfits. In addition to the shirt and tie, I was also wearing a straight, business-like skirt and no-nonsense shoes. They really added to the look. : ) We enjoyed getting quite a few laughs as people put two and two together and figured out what we were supposed to be.

Monday, November 8, 2010

monday menu

[coq au vin]

This morning we awoke to a beautiful, fluffy snowfall transforming out lovely late autumn into early winter! I must admit to having mixed feelings. There are so many pros and cons to cold weather...one of the pros is being able to bake a lot more and break out the cold weather recipes! Here's what I'm making this week:

M-home made pizza
T-chili and some kind of bread
W-macaroni and cheese
Th-steak, twice baked potatoes, salad
F-grilled cheese sandwiches and tomato soup

What are you making?

Sunday, November 7, 2010

baby quilt

Yesterday I got to go to a baby shower. It was a lot of fun. There were tasty treats, fun games, and time to catch up with old friends and make new ones. I even won one of the games and was awarded a cheerful tote bag.

I doubt that you'll be surprised to know that my gift was a cozy flannel baby quilt. I'm still working on using up my flannel scraps, and when I found out that these friends' baby girl was due in December, I knew that the unusual but beautiful combination of burgundy, dusty pink, and blue snowflakes would be perfect. I am delighted with how it turned out and am so glad that our friends loved it too.

P. S. I'm still loving free motion quilting these baby quilts. Each one turns out better than the last; soon I'll be trying designs other than stippling!

Saturday, November 6, 2010

trapezoid clutch tutorial


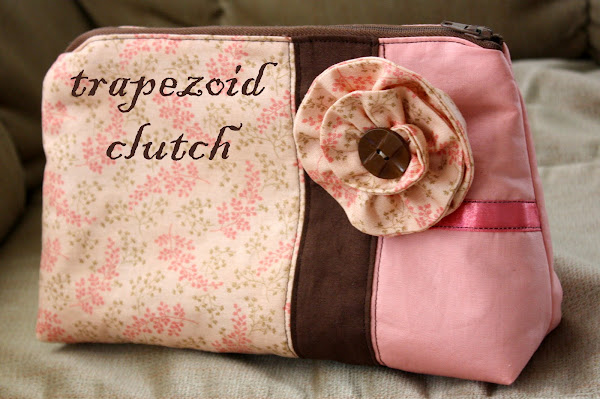
I have been wanting to begin writing tutorials for some time and have even received requests for tutorials on how to make things I post about. However, step-by-step photography and methodical writing is a rather labor-intensive project, and honestly, I'd rather just zip through my projects unencumbered. I finally buckled down, though, and am delighted to present you with the tutorial for the Trapezoid Clutch, which I designed. (Wow, that feels good to say!) I hope you enjoy it!

Note #1: Please excuse the poor lighting in the photos below; the best time for me to work is after the boys are in bed, which means that I'm working under not-natural light, resulting in some funkily-colored photos.
Note #2: As I mentioned above, this is my first tutorial, so if I leave anything out or something is unclear, please leave a comment with your question(s) on the blog post in which I introduced this tutorial. I'll do my best to answer them with a further comment.
Note #3: All the seam allowances are 1/4 in., unless otherwise noted.

Supplies:1: fusible fleece (you can use plain fusible interfacing, if you'd like, but I have excellent results with the fleece)
2-4: three coordinating colors of fabric
5: coordinating 9 in. zipper6: coordinating ribbon for accent (optional)7: coordinating thread

Tools:1: sewing machine2: rotary cutter, self-healing mat, and ruler (you can use a ruler, pencil, and scissors if you don't have a rotary cutter and mat, but it will be less accurate)3: scissors4: pins and needle5: (not pictured) iron and ironing board

1: Begin by cutting your fabric. You will need:~one 14 in. x 7 1/2 in. piece of fabric (Piece A, pictured above)~one 14 in. x 2 in. piece of fabric (piece B, pictured above)~one 14 in. x 4 1/2 in. piece of fabric (piece C, pictured above) If you look closely, you will notice that I made a piece of fabric large enough to make piece C by sewing two smaller pieces of fabric together. I covered the seam created by this by topstitching the coordinating ribbon over it before moving on to the next step.~one 14 in. x 13 in. piece of fabric (piece D, pictured above) for the lining of the bag.~one 14 in. x 13 in. piece of fusible fleece (not pictured above)

2: Pin piece B to piece A, right sides together, lengthwise. Sew together. Repeat with piece B and piece C. Iron and trim (if necessary) to 13 in. x 14 in. You now have two 13 in. x 14 in. rectangles: a solid one for the lining, and a striped one for the outer bag.


3: Fold both rectangles in half, carefully matching the edges, making 13 in. x 7 in. rectangles. Finger press the folds to make sure they stay in place.


4. At the top of your rectangles (where the two edges of fabric come together, not on the fold), measure and mark two inches from the side. Repeat with the other side and with both sides of the lining rectangle.

5. Connect the bottom corner (right where the fabric folds) and the two-inch mark you just made with your ruler. Cut along this diagonal line. Repeat with the other corners and two-inch marks.


You should now have two trapezoids.


5. Repeat steps 3 and 4 with your fusible fleece rectangle. Only instead of marking the top edge 2 inches from the sides, mark it at 1 7/8 in. from the sides


6. Unfold the striped, outer layer of the bag and the fusible fleece. Place the fusible fleece "fuse dot" (I'm not quite sure how else to describe it) side together with the wrong side of the striped outer layer of the bag. Line the fleece and fabric up at the corners where the fold was. Iron to fuse the fleece and the fabric together. Usually after lining up the fleece and fabric, I carefully turn it over and press from the fabric side. You may want to experiment on scraps to find what works best with the combination of your iron and fabric.


7. Note that in the photo illustrating the previous step, the fusible fleece is smaller than the fabric. Make a 1/4 in. fold with the unlined section and iron it so that it will stay crisply folded. Repeat with the other side as well as with the lining fabric that isn't attached to fusible fleece.


You should now have 1/4 in. folds on all four edges that formed the tops of the trapezoids when the fabrics pieces are folded in half.


8. Do whatever decorative top stitching you want on the outside layer of the bag. I chose to sew straight lines 1/8 in. on either side of the seams between the fabric stripes.


9. Now it's time to put the zipper in. Put the unfolded bag lining and the striped, outer bag layer, wrong sides together. They should be the same size, and the folded edges of the lining and outer layer should be together. Place the unzipped zipper between the two folded edges. The end of the zipper teeth should be about 1/2 in. from the unfinished fabric edges (shown in above photo), and the two fabric layers (the lining and outer bag) should be the same distance away from the zipper (between 1/8 in. and 1/4 in.). Carefully pin the zipper between the layers in this position.


I use a lot of pins, and I carefully check both sides as I go to ensure that both layers are an even distance from the tooth part of the zipper. You will also want to make sure the fabric is far enough away from the zipper teeth that the sliding part of the zipper can move smoothly back and forth.


10. Sew the length of the pinned fabric about 1/8 in. from the folded edge. This seam should secure both the top layer (the outer part of the bag) and the bottom layer (the lining of the bag) to the zipper, in a nice, tidy way.

If you pinned carefully, the top should look like this.


And the bottom should look like this.


11. Repeat steps 9 and 10 with the other side of the zipper and the other neatly pressed edges. When you're done attaching the zipper, it should look something like the photo above.


12. Move the sliding part of the zipper to the middle, and turn the bag inside out. The bag should now make a sort of figure eight with the zipper in the middle.


13. Pin the sides together as pictured. (Ignore the seam stitched with light thread up the brown lining; I had to piece it too.)
14. Sew a 1/4 in. seam from one point to the other on the first side. Make the zipper lay as flat as possible, and backstitch over it for added stability.

15. On the second side, you will want to start at the point of the outer part of the bag, cross the zipper (remembering to try to make it lay flat and backstitching over it!). Backstitch about 1/2 in. past the zipper on the lining side. Skip about two inches, backstitch, and resume your seam 1/4 in. from the edge. Continue until you reach the corner.
(Sorry for the lack of photos)


16. Now it's time to box the corners. Take one of the bag exterior corners, and fold it so that the seam in in the center (as pictured). Make sure that it's truly straight up and down with an even amount of fabric on either side. Pin it so that it stays where you want it. (Okay, so I didn't do it for the photo, but it really helps!)


17. Use your ruler to find the spot where your little fabric triangle is 2 1/2 in. wide. Mark it, and sew along the line. Don't be afraid to be pretty aggressive with your marking; it won't show. : ) Repeat with the other exterior corner as well as with both lining corners. Backstitch at each end for additional strength.


18. Once all four corners are boxed, trim them about 1/4 in. away from the new seams.
19. Squeeze your fingers inside the little hole left in the lining. Unzip the zipper, grab the bottom of the outer layer of the bag, and pull it right side out through the hole. It'll probably be pretty tight fit, but it should all come through with a little coaxing.


20. Turn the bag so that the lining is visible. Fold the exposed, raw edges of the hole you used for turning the bag right side out neatly back about 1/4 in. (to match the width of the rest of the seam). Hand sew the hole closed, preferably with an invisible stitch.
21. Turn the bag right side out. Iron it if you want to.
22. Admire your handiwork: a cute, completed trapezoid clutch!

There many variations you can make based on this basic pattern. You could use a simple, solid piece of fabric instead of sewing three together to make stripes. Or you could make horizontal stripes instead of vertical stripes. You could use more prints to make more than three stripes of fabric or you could only use two. You could even add ruffles, bows, lace, or a flower pin (tutorial coming soon). Let me know if you used this tutorial and what variations you did. I would love to hear about it (and maybe even see some photos for further inspiration)!